I had a dudhi sitting in my fridge since two days staring at me, pleading with me to rescue it from the freezing temperature inside. I looked at it and shut the refrigerator door each time. It is such a boring vegetable!
What could I do with it?
Dudhi-chana dal shaak? ruled out..(hubby likes it..not me)
Dudhi-kofta curry? ruled out..(Hubby won’t like it…requires deep-frying..and too much mehnat)
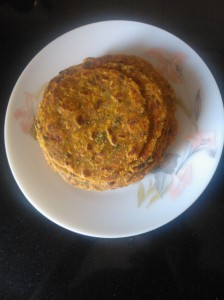
Dudhi theplas? ruled out..(Done it too many times..my kid is bored with them)
Muthias?…Yeah..why not?..I love them..Kido may eat them..Hubby won’t mind..Bingo!..my mind was made..So the dudhi got finally rescued (*chuckle*) from the fridge and devoured..and it tasted oh so damn nice that my mom actually called me up for maybe the first time to let me know how much she liked it.
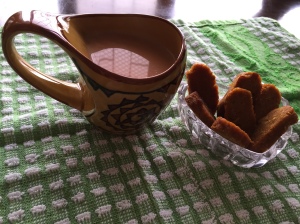
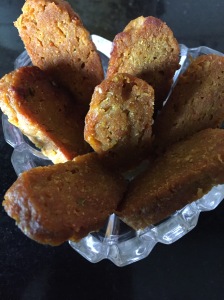
Ok..so muthia actually means fist in Gujarati..I guess the name is derived from the fact that these things are shaped with your fist..But I don’t like looking at huge, bulky,shaped-by-fist muthias..so I try to shape them to look like small biscuits or cookies.
Muthias are generally made by adding besan flour. I also like adding rice flour along with besan to make them a bit crisper. In this recipe, I tried adding jowar flour instead of rice flour and the result was quite amazing. So here’s what you will need to make these muthias –
Ingredients:
1 medium-sized dudhi or doodhi or bottlegourd or lauki (or whatever you call that long thing)
1 cup besan
2 cups jowar flour (or as required)
2 green chillies (finely chopped)
2 tbsp red chilli powder (I usually use the Kashmiri lal mirch. You can add as per your taste)
1 tbsp coriander powder
1 tsp turmeric powder
1 tsp ajwain seeds (I always add this when using besan in any recipe)
1 tsp hing powder/asafoetida (I always add this when using besan in any recipe)
1 tsp ginger paste or a small piece of ginger(grated)
1 tsp sugar
Salt to taste
Oil as required
Method:
1) Wash, peel and grate the dudhi. Keep aside.
2) Add salt , besan and jowar flour. Mix well. (After adding salt, the dudhi juices are easily released and this helps in binding the ingredients. Do not add water at any stage in this recipe)
3) You will have to adjust the amount of flours to be added as per the liquid content in the doodhi.
4) Add the chillies,ajwain,hing,chilli powder,dhania powder,turmeric,sugar,ginger paste and 1 tbsp of oil and mix well till you have a dough like consistency.
5) Take some part of this dough and shape into cylindrical rolls which are palm-sized in length. The thickness or breadth of the roll should be as per your liking (Tip: Think of a sausage roll).
6) Add some water to a steamer (i.e an idli/dhokla steamer) and steam the rolls for about 10-12 minutes (Stick a knife in the middle of each roll to check if they are done. The pierced knife should come out clean. If not, steam them for another 5 minutes or so and check again).
7) Cut each roll into smaller bite sized pieces. (You can do a basic tadka with jeera,mustard and sesame seeds and add these pieces to the tadka and eat them straight away – healthier version..)
OR you can proceed to step 8..which is what I like to do
8) Take a pan and add about 3 tbsps oil and shallow fry these pieces. Turn them and ensure both sides are light brown and evenly colored)
Serve these as a side dish with dinner or as a tea time snack.
You can try out this same recipe with grated cabbage..and maybe I should see how this tastes with grated pumpkin..What say?…Any other ideas..let me know..
If you know any other simple and interesting recipes with this boring vegetable..do share.


